
Quick answer
This guide walks through one complete project in Mosaci Studio: creating it, importing images, choosing what kind of page to make, converting, and exporting a print-ready PDF. It follows the Studio as it works today. If you only want to see what comes out at the end, open the sample Studio export: a real 13-page book PDF made with the default settings.
Before you start
You need a free Mosaci account to use the Studio. Converting and previewing are free; credits are only used when you download, at 1 credit per image the first time (see Export your first PDF). Every account gets 10 free credits each month.
Want to see how one of your images converts before signing up? The free converter on the color-by-number generator page runs the same conversion in your browser, without an account. It shows a preview only; the print files come from the Studio.
Use images you own or are licensed to use. JPG, PNG and WebP files up to 40 MB each are accepted.
Create a project
- Open the Studio and go to Home.
- Click New Project.
- Choose Import Images (individual images) or Import Folder (one existing folder with a fixed structure). For a first project, pick Import Images.
- Type a Project name and click Create project.
The Studio opens the import screen straight away.
Import your images
Click Select or drop images, or drag files onto it. You can add several at once; each image becomes one page in the book. You can add more later from the Convert step with Add.
Choose numbered cells or mark style
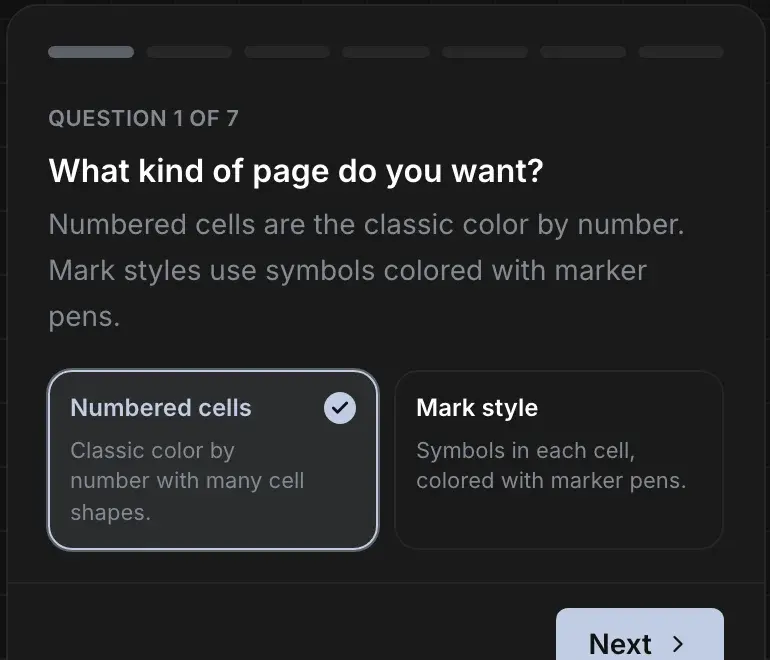
After importing, the Studio asks a short set of setup questions, one at a time, with a live preview of your image on the left. The first question decides what kind of page you get:
- Numbered cells: classic color by number. Each cell carries a number, and a color key tells you which color goes with it.
- Mark style: each cell carries a symbol drawn with marker pens instead of a number. If you choose it, the Studio then asks Colored or monochrome marks?
- Monochrome: shades of one pen color. Clean and graphic; the picture appears as you draw the marks in black.
- Colored: each mark in its own color, detected from the image.
- Vivid colored: only the 10 standard gel-pen colors. Bold and bright, less true to life.
If Mark style is not offered on your account, only numbered cells are available to you right now.
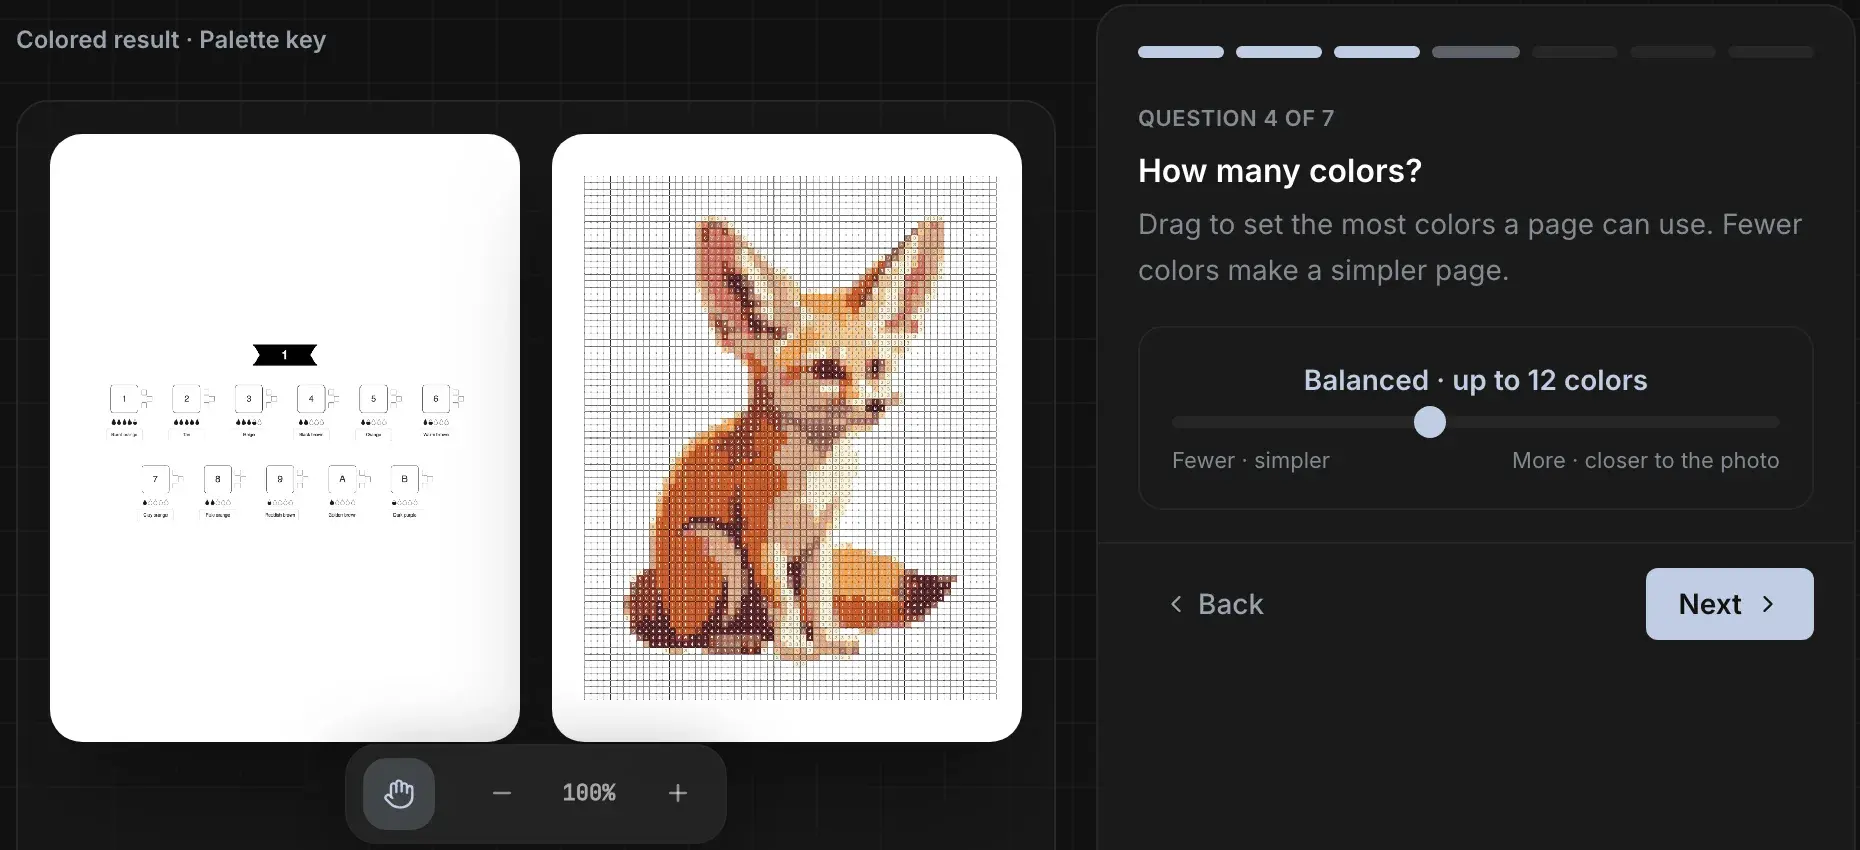
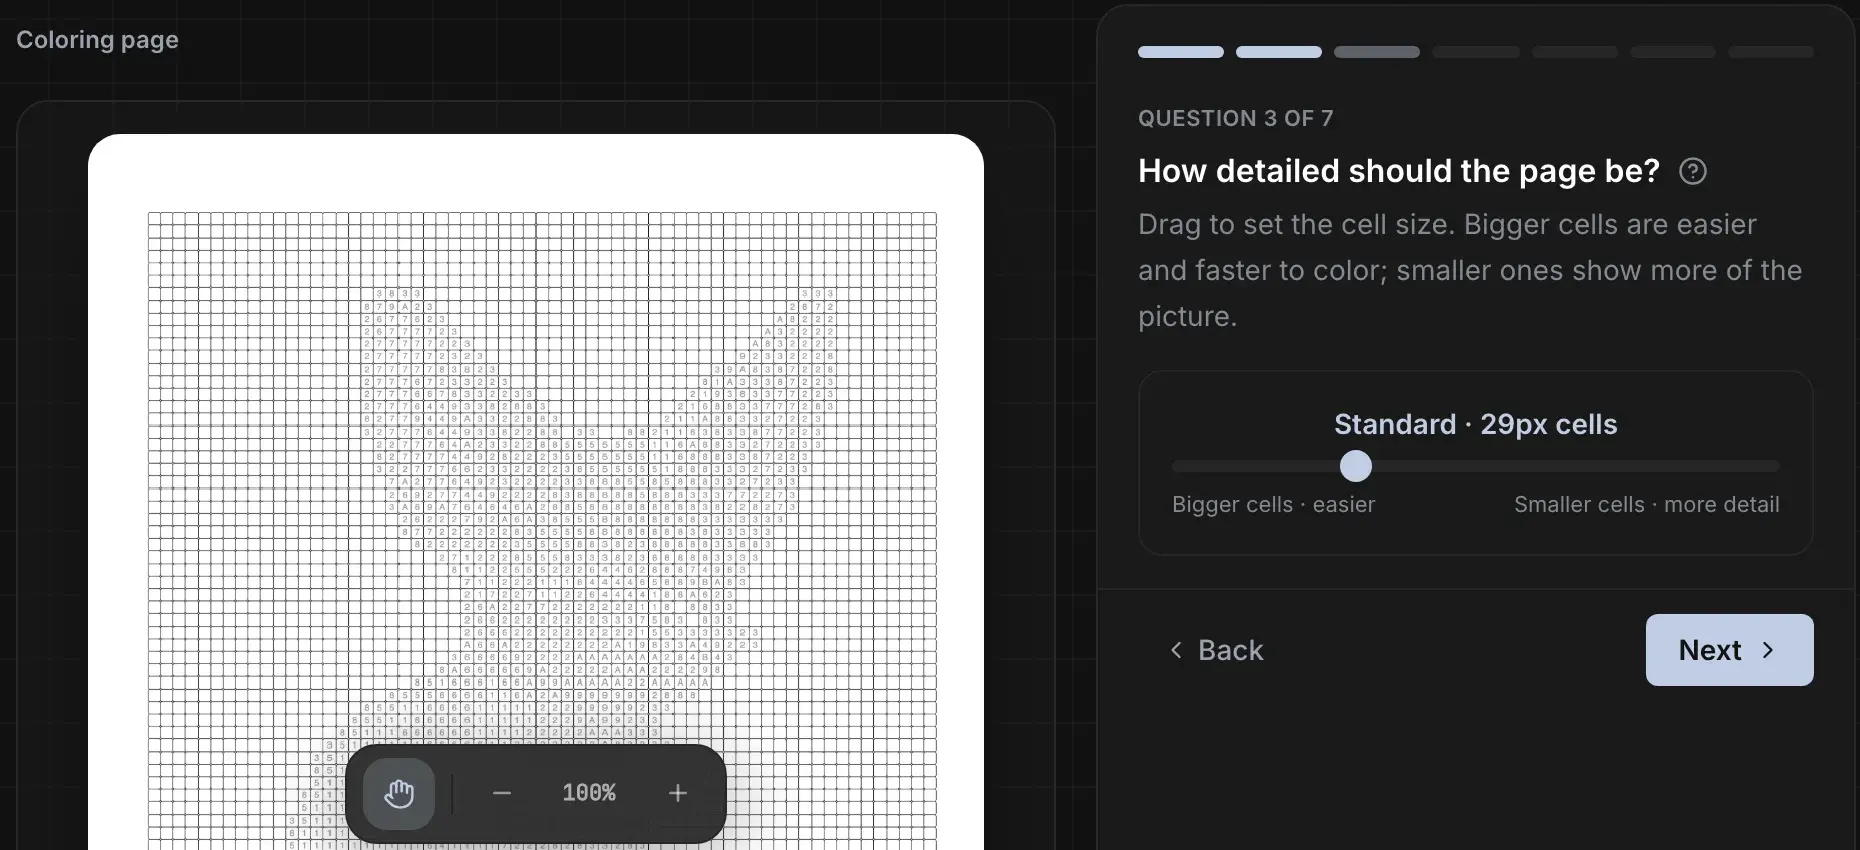
The remaining questions set the pattern (cell shape), how many colors to use (for numbered cells), whether the palette key is printed in color, the cell size, the page size and the background. Two of them matter most:
- How detailed should the page be? sets the cell size. Bigger cells are easier to color and keep numbers readable; smaller cells keep more detail but are harder to color by hand. The default is 29 px.
- Which page size? sets the trim size of the printed book: 8.5 × 11 in (the default), 8 × 10, 8.5 × 8.5, 7 × 10 or 6 × 9.
When the summary screen says Your settings are ready, you can change any answer with its pencil button. More options opens the full settings panel, including the bleed setting.
Convert and check the pages
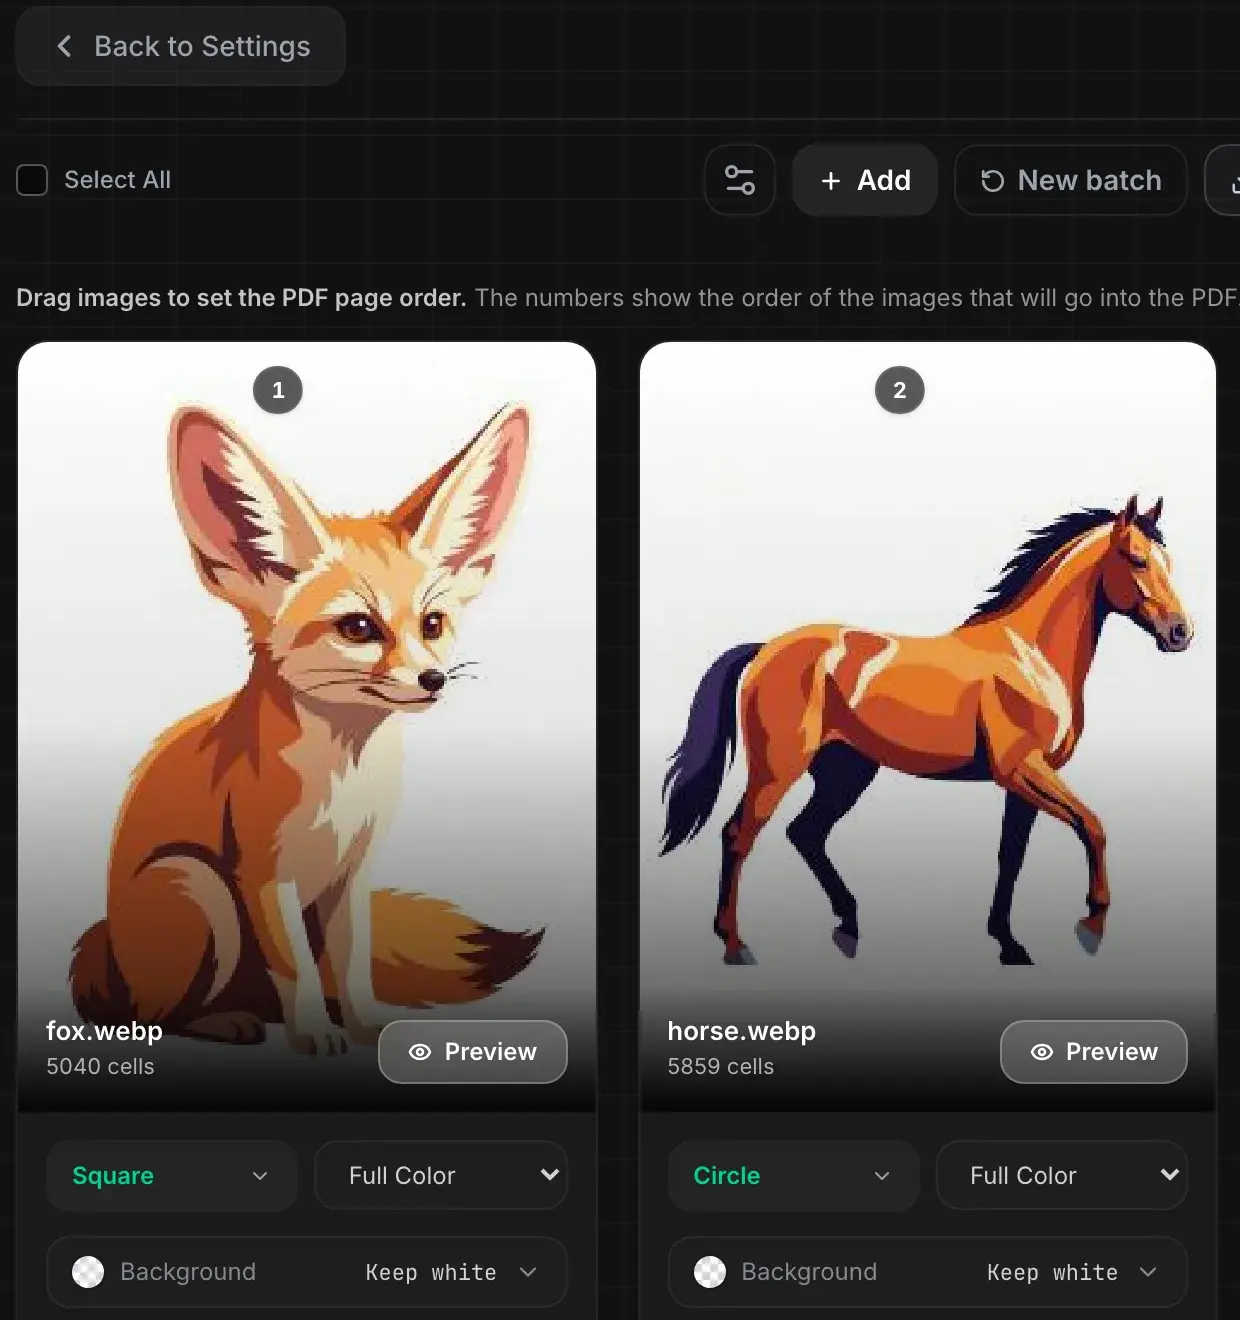
Click Next: Convert Images, then Generate All. Each card shows the converted page, its pattern and its cell count. Use Preview on a card to check that the numbers or marks are readable and the subject still reads clearly. If a page looks too coarse or too busy, go back and change the cell size or color count, then click Regenerate. Converting again is free.
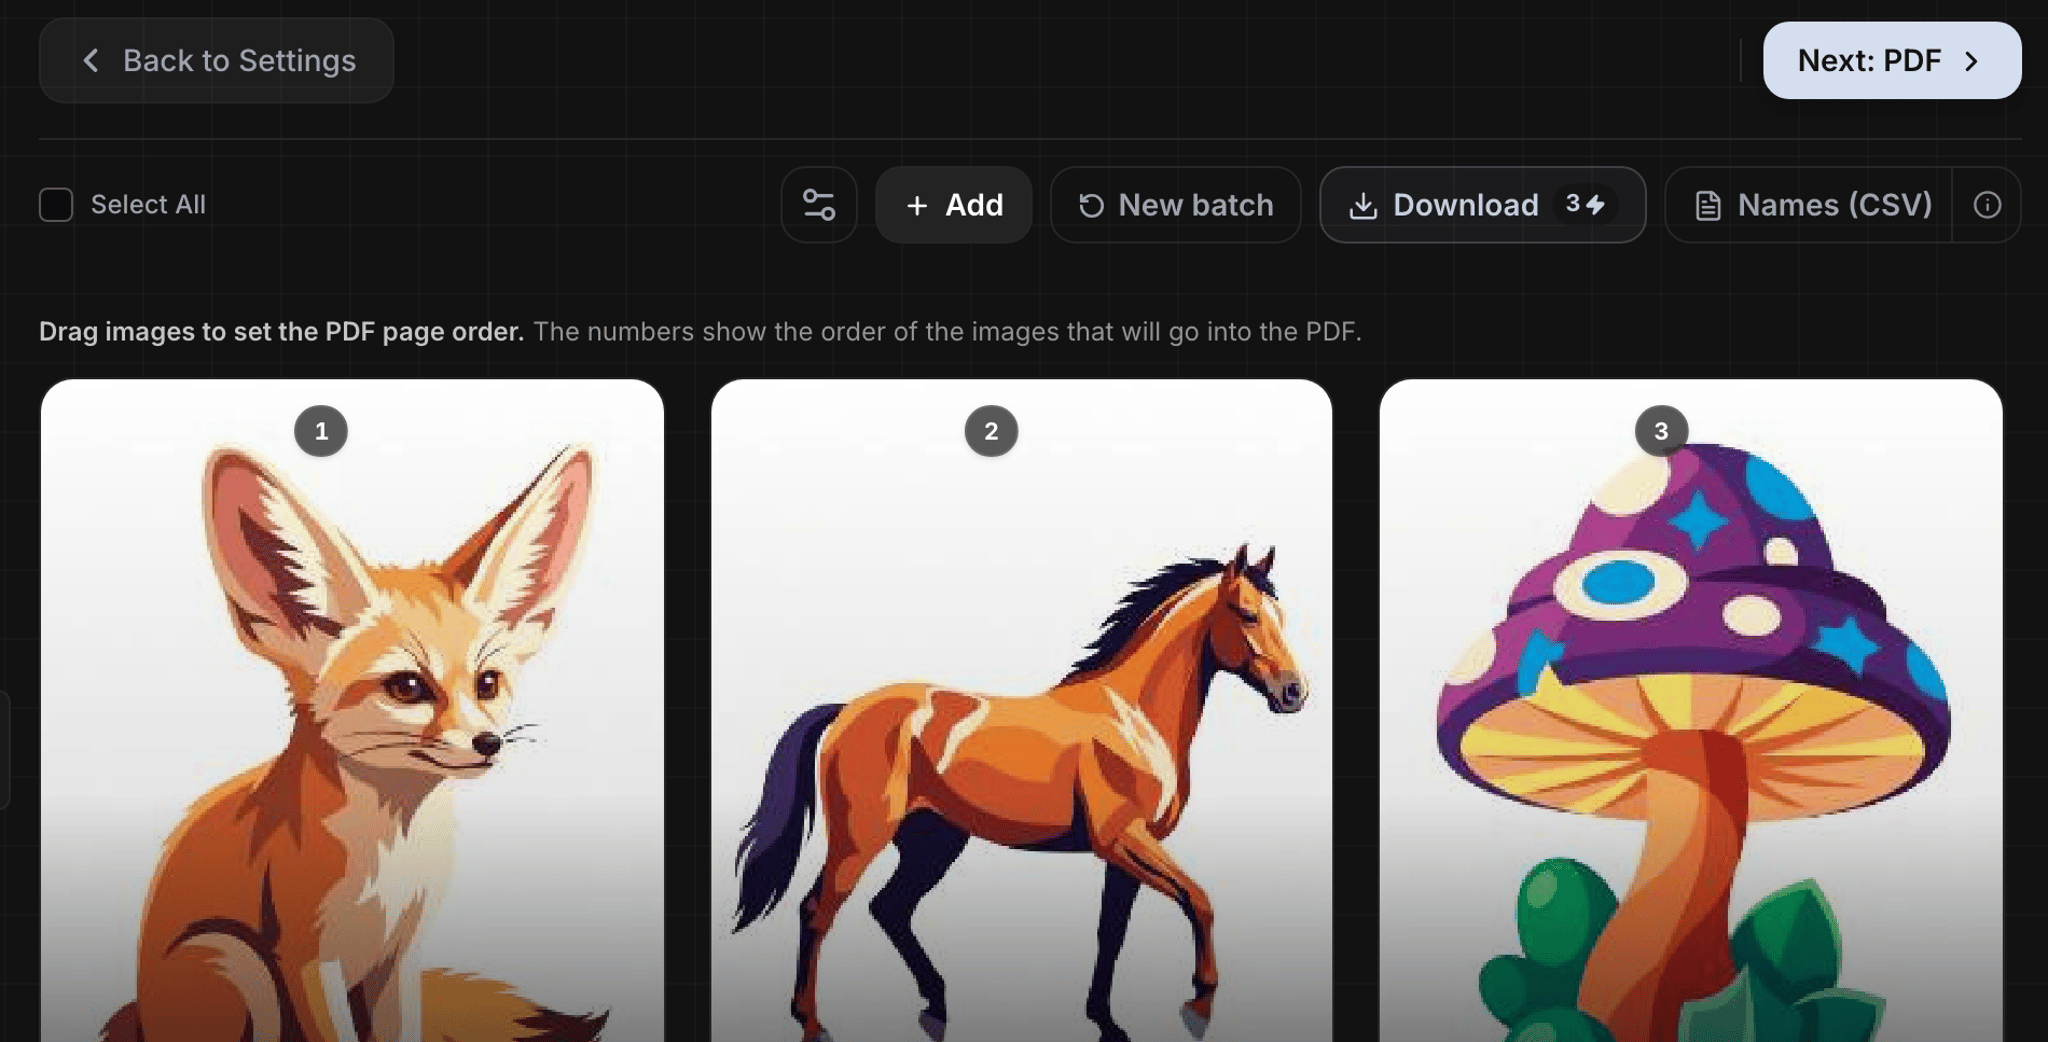
Drag the cards to set the order of the pages in the PDF.
Export your first PDF
- Click Next: PDF.
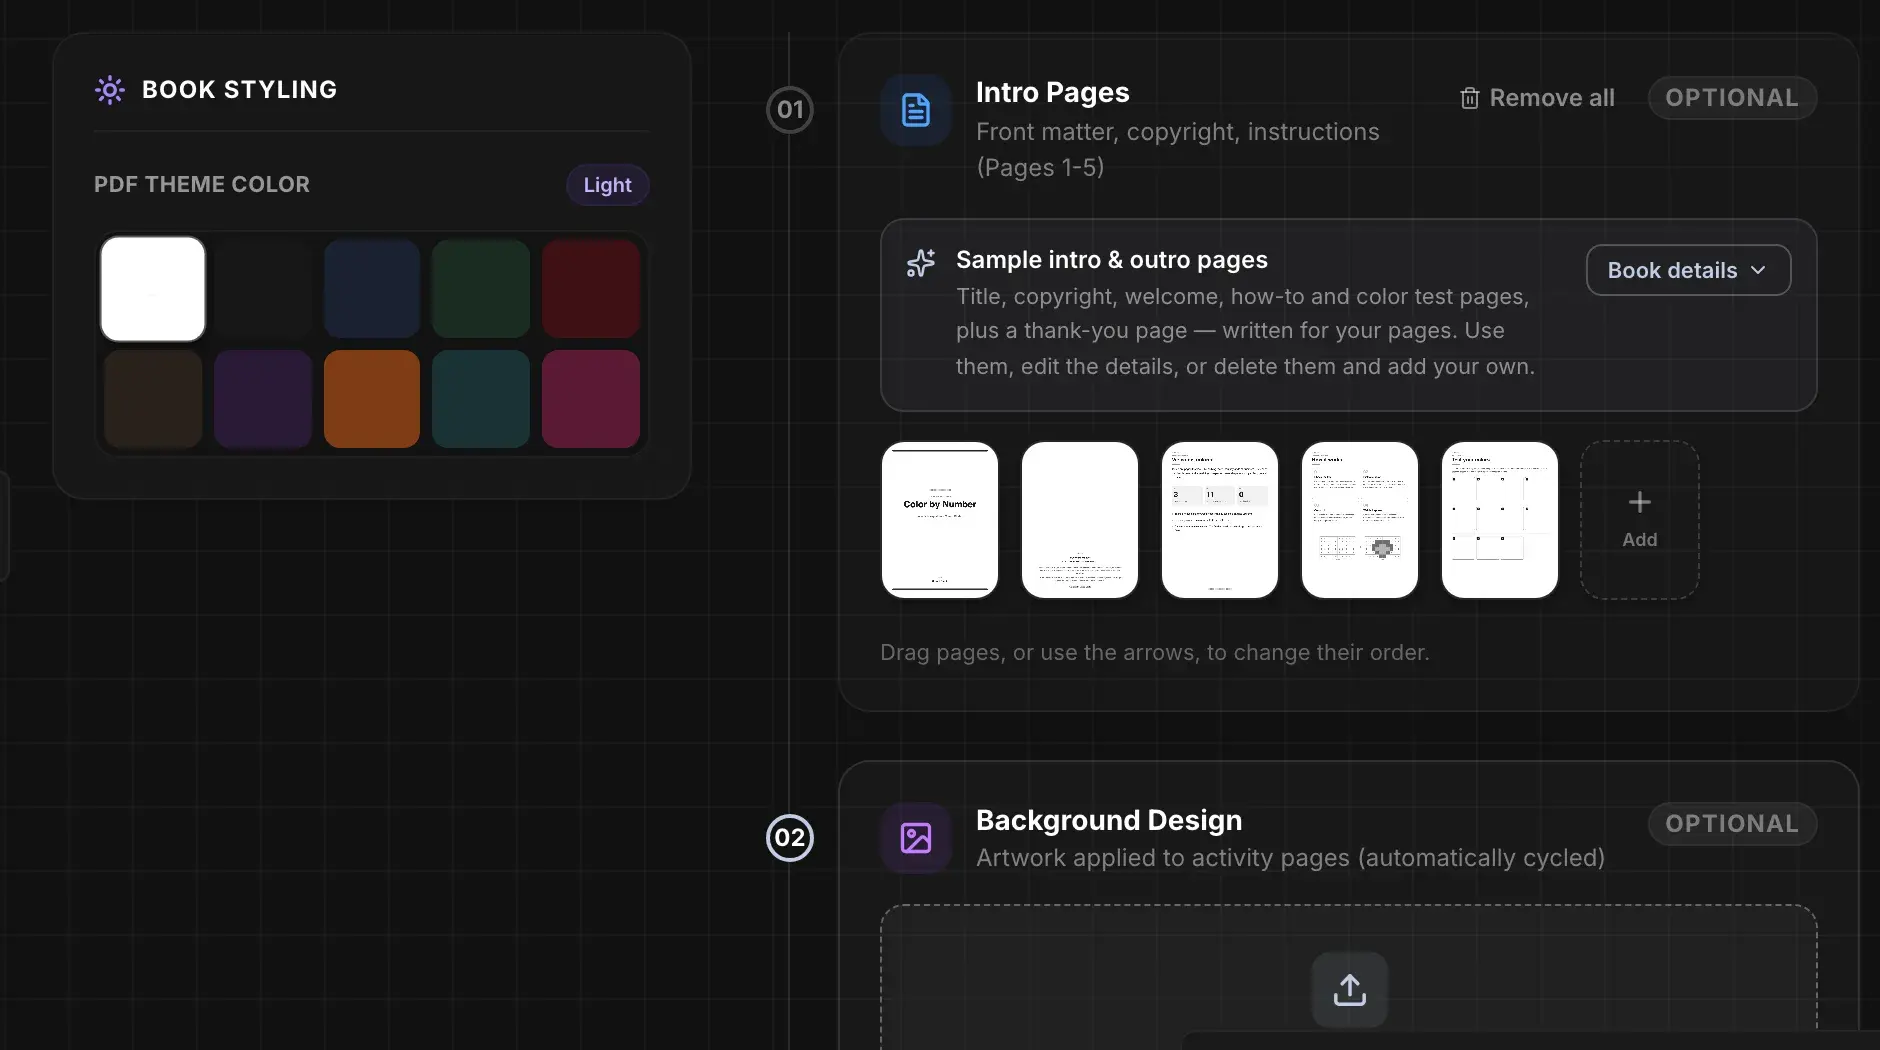
- Optionally add pages around the coloring pages. Intro Pages can generate sample title, copyright, welcome, how-to and color-test pages for you. Open Book details to set the title, subtitle and author before you generate them. You can also add background artwork, change the palette layouts, and include a solutions page and outro pages.
- Click Preview book to see every page. Previewing is free and uses no credits.
- Click Generate & Download PDF.
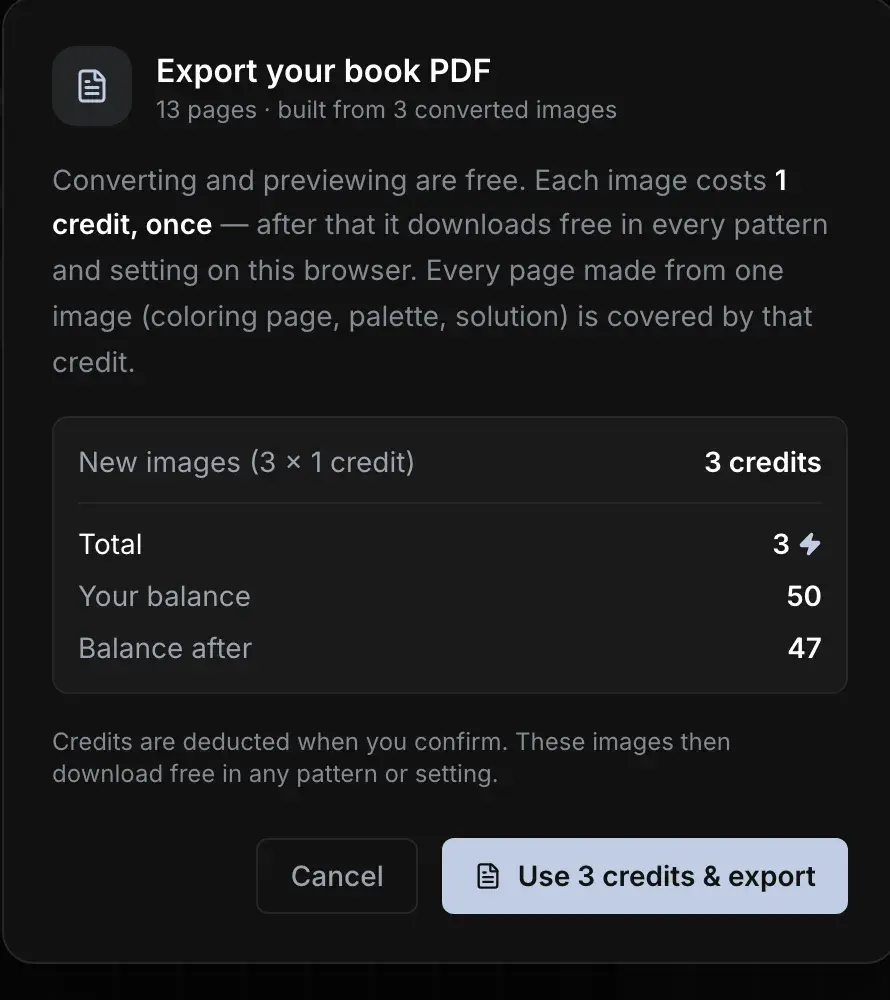
Before anything is charged, a confirmation shows how many images are new, how many are already paid for, and your balance before and after. Each image costs 1 credit, once. That credit covers every page made from the image (coloring page, palette, solution), and the image then downloads free in any pattern or setting on that browser. Credits are only deducted when you confirm.
The download contains the book PDF and a separate color shopping list PDF that lists every color used in the book and how much of each you will need.
Check the PDF before you upload to KDP
Open the PDF and check it yourself before uploading:
- Page size. With bleed on (the default), each page is the trim size plus 0.125 in on the width and 0.25 in on the height, so an 8.5 × 11 in book has 8.625 × 11.25 in pages. With bleed off, the pages are exactly the trim size. Pick the matching bleed option when you set up the book on KDP.
- Page count. KDP paperbacks need a minimum page count. The Studio warns you when a book is shorter than that, but check KDP's current requirement for your format.
- Readability. Zoom in on a coloring page and check that the numbers or marks are clear, and that every code on the page appears in its key.
- Order. Each coloring page follows its own key, and solutions come at the back.
For the full set of KDP interior specs (margins by page count, resolution, file limits), see KDP coloring book interior specs.
Where your projects are saved
Projects are saved in this browser only, not in your account. Clearing your browser data, or using another browser or device, means the projects are not there. The Studio warns you when browser storage is nearly full, and Settings shows how much space your projects use.
Back up a project or move it to another device
- On Studio Home, open the project's menu and choose Export backup. The Studio saves a backup file.
- On the other browser or device, sign in, go to Studio Home and click Import project, then choose that file.
Importing always creates a new project; it never overwrites one you already have. Keep a backup of any project you care about, especially before clearing browser data.
Printable quality checklist
- Images are yours or licensed, JPG/PNG/WebP, under 40 MB each
- Output type and cell size chosen in the setup questions
- Every page checked with Preview after converting
- Book previewed with Preview book before exporting
- PDF page size and bleed match what you select on KDP
- A backup exported for any project you want to keep
Key takeaways
- Converting and previewing are free; downloads use 1 credit per image, once.
- The first setup question chooses numbered cells or mark style (monochrome, colored or vivid colored).
- Cell size and page size are the settings that matter most for a printable result.
- With bleed on, an 8.5 × 11 in book exports as 8.625 × 11.25 in pages.
- Projects live in your browser; Export backup and Import project move them between devices.
Frequently asked questions
Does converting an image use credits?
Are my Mosaci Studio projects saved to my account?
What page size does the PDF use?
Related tools
Written by
Mosaci Studio TeamThe team behind Mosaci Studio
Mosaci Studio is built to help KDP publishers, Etsy sellers, and hobby artists turn photos into print-ready coloring pages without any design experience.
Published Nov 13, 2026